

.jpeg)

Why build a meme generator app?
If you’re new to the world of web development and vibe coding, what’s a better way to learn than by building something fun?
A meme generator may sound simple, but the real challenge is building an intuitive interface where anyone can easily create and customize memes:
- Drag and drop captions onto any template,
- Resize or rotate text with ease, and
- Style everything from fonts, colors, shadows, to strokes, and more.
In this blog post, we’ll walk you step by step through the process of vibe coding a meme generator using WeWeb AI.
The best part? You’ll get a real look at the vibe coding process - the wins, the frustrations, and how to avoid falling into vibe debugging hell.
Let’s get to it! 👇
A quick demo of the meme generator app
Here’s how it works (we’ll cover how to improve it later):
Step 1: Pick a template from the left menu:

Step 2: Customize your meme in the editor panel. Add captions, change fonts, colors, shadows, adjust text position, rotation, and more:

Step 3: Download your masterpiece as a PNG once you’re happy with it:

P.S. - The meme generator app is now live on the WeWeb marketplace and it's free to use. You can clone it, customize it, or even turn it into your own meme SaaS.
Steps to build a meme generator app from scratch
Step 1: Create a WeWeb account. It's free!
The first step is setting up your WeWeb account.
Unlike other vibe coding tools, the beauty of WeWeb is that you can prompt AI to bring your ideas to life 70–80% of the way.
From there, instead of eternally prompting AI, you can switch to the no-code editor to finish the last 20% and push your app into production.
If you haven’t already, sign up for a free WeWeb workspace.
Step 2: Generate the UI
Instead of starting from a blank page, ask WeWeb AI to generate the initial layout for you.
Since we’re starting from scratch, leave the AI's mode set to Build and pass the entire project as context:

You can use natural language prompts, and if you’ve got a wireframe or UI reference, you can even upload it as an image:

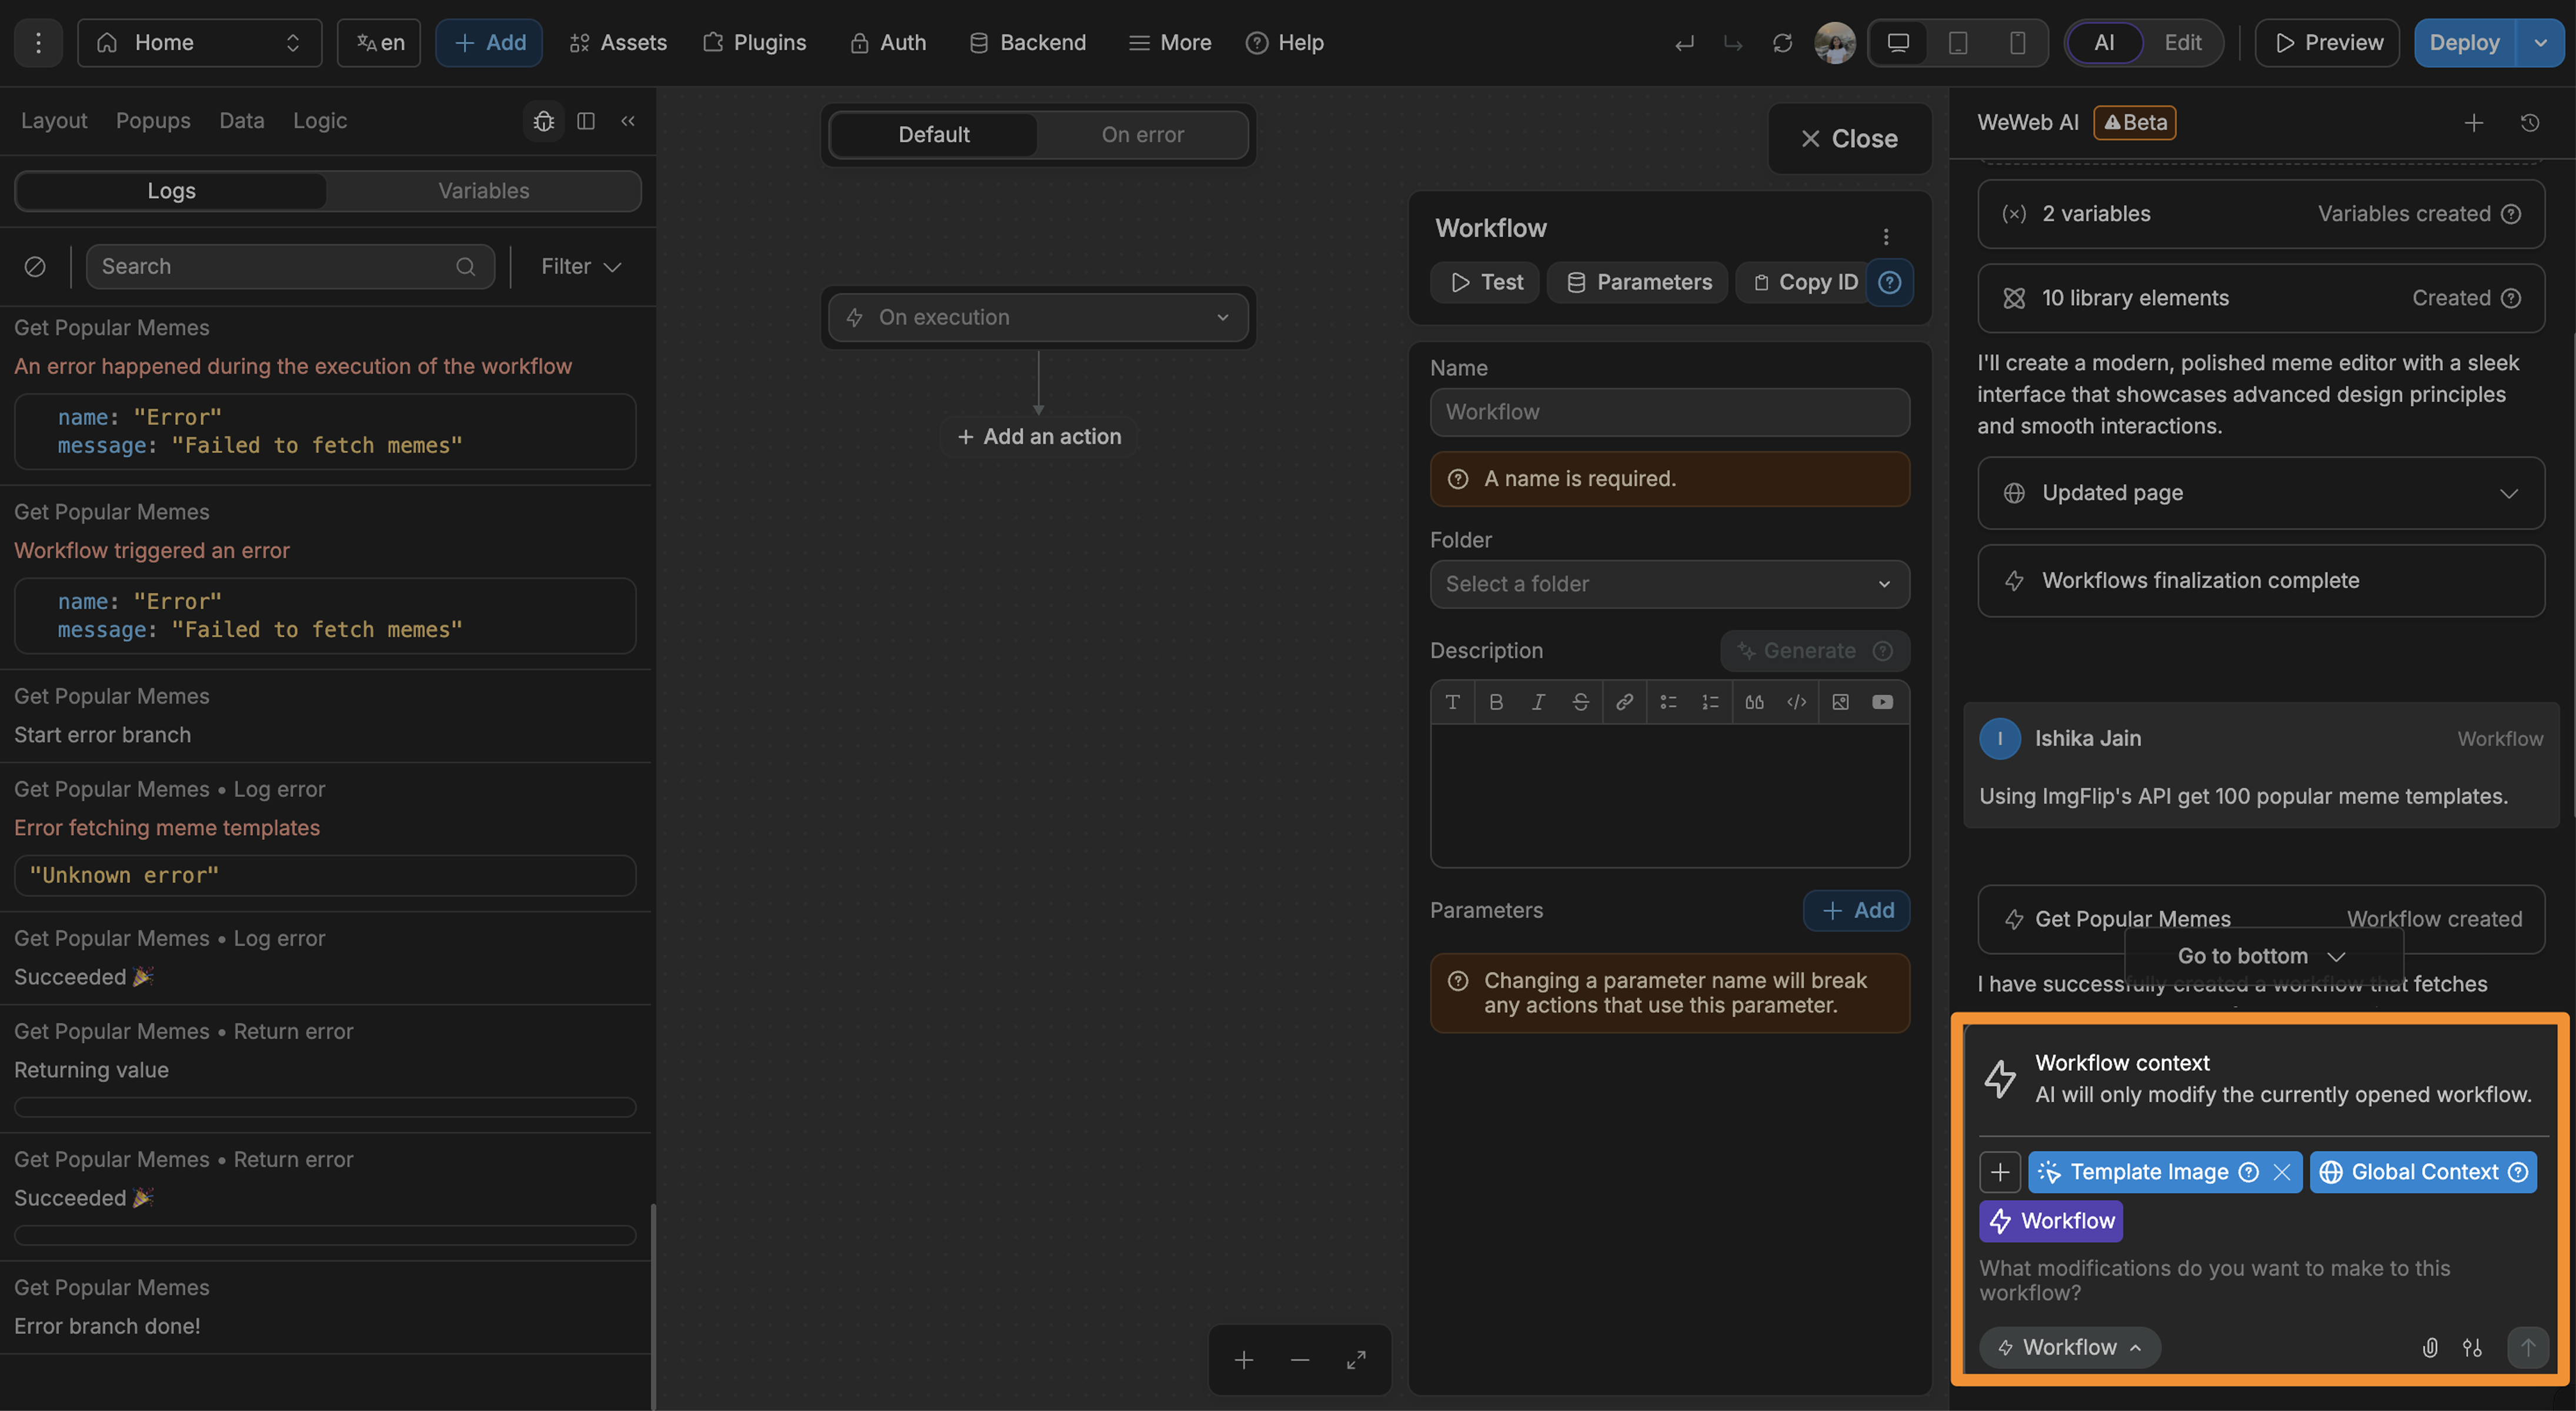
Step 3: Fetch meme templates using ImgFlip's free API
Once the AI generates the design, it’s time to replace the dummy templates with real meme templates.
We’ll use ImgFlip’s API to fetch popular meme templates for free:

- Add the REST API plugin to your WeWeb project:

- Create a page workflow, like so:

- Switch to the AI tab. WeWeb AI will automatically flip into Workflow mode so it only edits the opened workflow:
- Add the memeTemplates variable as context so the AI knows where to store the data:

- Then, prompt AI to set up the logic:

- Finally, test the workflow and verify the response status in the Logs tab:

⚠️ If the logic doesn’t work as expected, double-check the following:
- In edit mode, enable Proxy request server side to handle CORS:
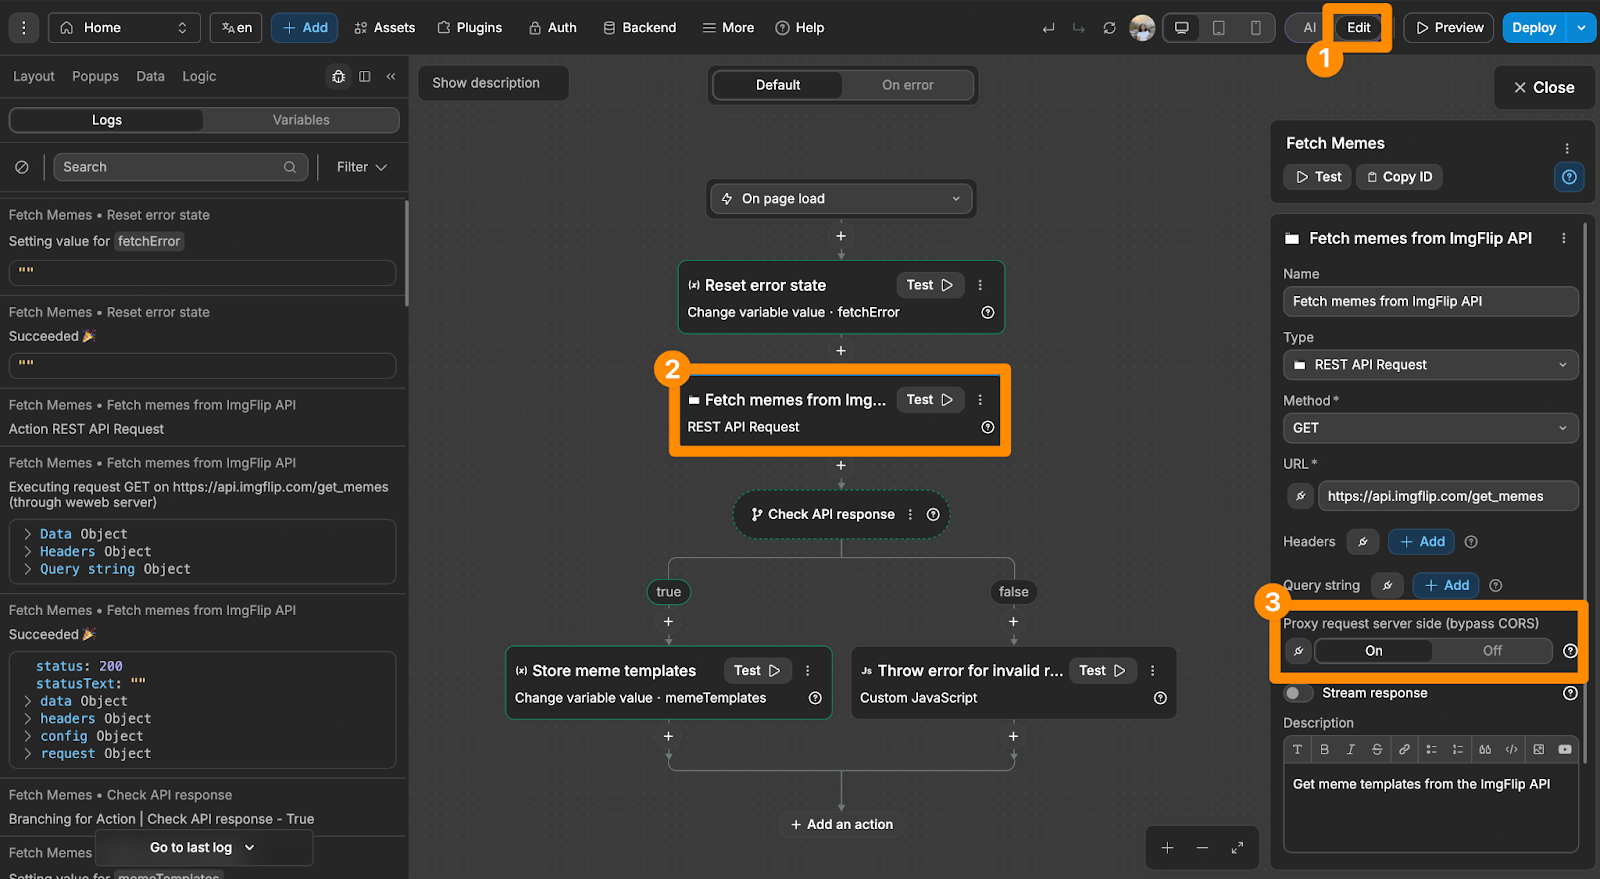
- Confirm your branching logic is correct:


Step 4: Create an editor to customize text on images
Why not just use ImgFlip’s caption API? Two reasons:
- it's a paid feature, and we want to keep this meme generator app free, and
- the styling options offered are limited.
So instead, let’s build a custom image editor.
Switch WeWeb AI to Coded component mode and give it a clear prompt:

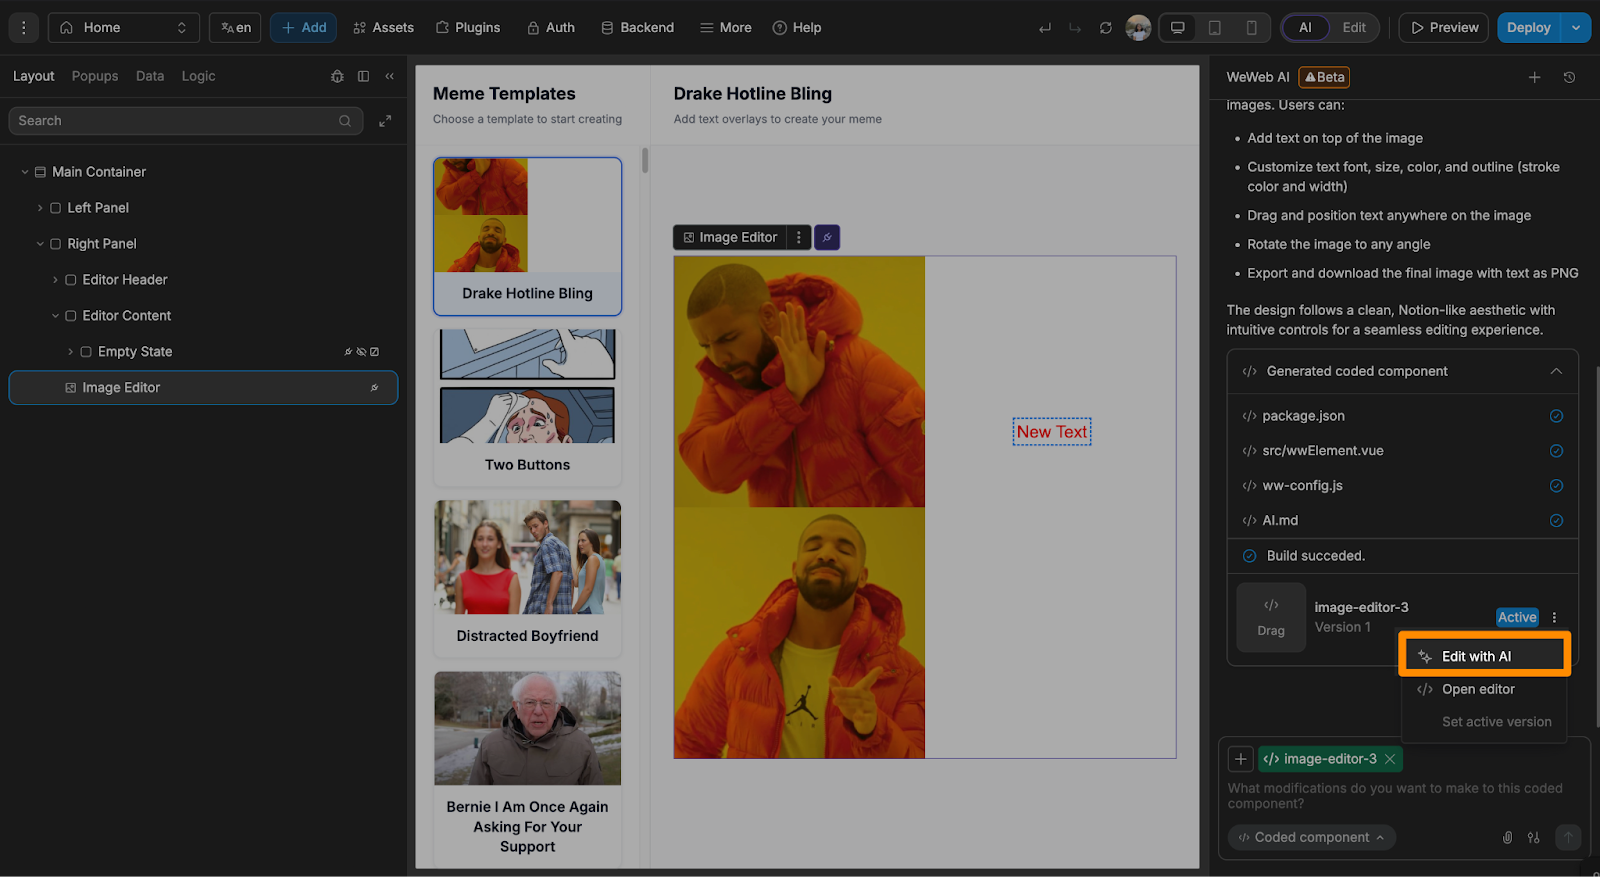
Once the AI generates the component:
- Drag and drop it into the editor and remove the placeholder image:

- Now bind the selectedTemplate image to the editor:

From here, you can keep iterating with AI to refine the editor:
But sometimes the iterations won’t match your vision, that’s when it’s best to switch to the no-code editor and take over manually.
Step 5: Understand AI code & make manual edits
To tweak things yourself:
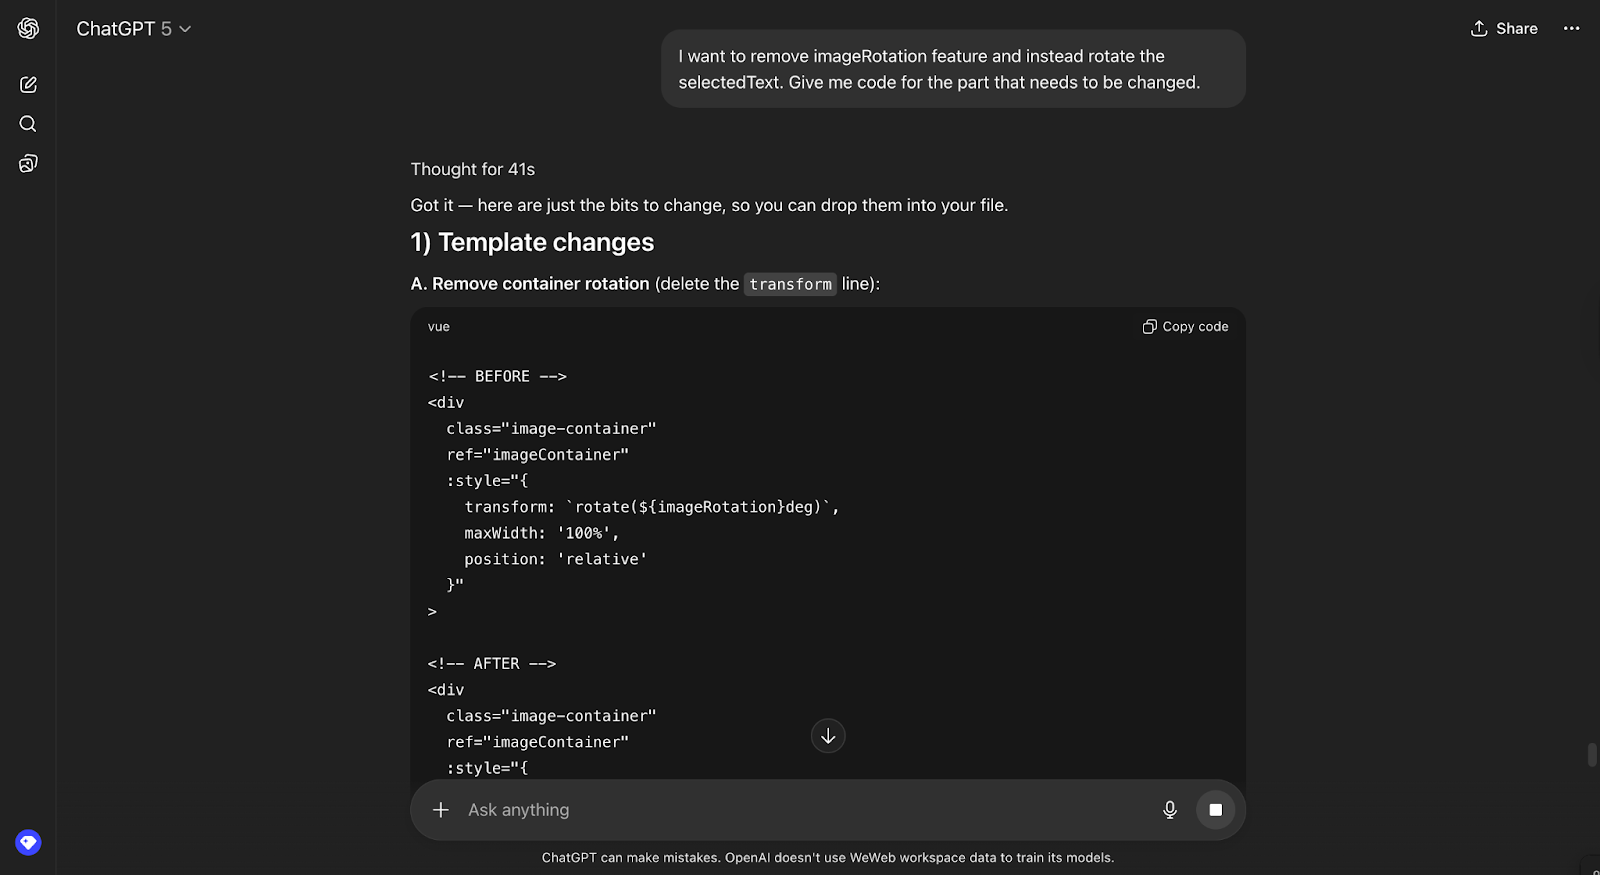
- Check the AI.md file to better understand the component and use code-specific words in your prompt (e.g., use imageRotation instead of “image rotation”):

- Dig into the actual code. Copy-paste it into ChatGPT or Claude and ask for a breakdown, like so:


- Tell ChatGPT or Claude the features you want to modify or add, ask for the updated code for specific sections, refactor the code suggestion, and then copy-paste:
Taking it further: Customize & monetize
Hopefully, this guide helps you get your meme generator up and running.
Right now, it’s a simple meme generator app with an intuitive interface where users can freely customize meme templates. But this is just the starting point.
Here are some ideas to take it further (and maybe even turn it into a SaaS product):
- Build a backend to store and manage your own meme templates.
- Add AI-powered categorization to sort memes by type (funny, political, gaming, movie-related, etc.).
- Introduce an AI chat assistant where users can describe a scenario and receive meme template recommendations.
- Enhance the image editor to automatically place dummy text in predefined spots on the canvas based on the selected template.
- Implement authentication and permissions so users can create accounts and manage their content.
- Polish the UI/UX to make it more branded, professional, and visually engaging.
Happy Building!
Frequently asked questions
How to create a meme generator app with no coding experience?
With the rise of vibe coding and AI-assisted development you don’t need to code a meme generator app from scratch. With platforms like WeWeb, Lovable, Bolt, and Replit you can describe your meme app idea, its design and key features.
For example, you can prompt:
“I want to create a one page meme editor where users can pick a meme template from the left side menu and using an image editor on the right side add captions. The design should be clean, modern, and Notion-like.”
The AI will generate the layout, image editor component with a text editor, and export button automatically. If you want to save memes or add templates, you can easily connect a backend like Supabase.
For a quick start, use this ready-made WeWeb template.
What are the key features of a meme generator app?
There are plenty of features you can include to make your meme generator app truly stand out, like:
- Searchable meme templates
- Template categorization
- Intuitive image editor
- Multi-format downloads
- AI-powered meme generations
What is the cost to develop a simple meme generator app?
With WeWeb, the cost to build a basic meme generator is zero.
In our guide above, we didn’t rely on ImgFlip’s paid caption API. Instead, we chose to create a custom editor to add and stylize text over meme templates. The meme templates themselves were fetched using ImgFlip’s free API. So there were no costs involved.
That said, the total cost really depends on your features. Now, if you decide to integrate AI features, costs can rise based on the large language models (LLMs) you use. Likewise, if you want to host user accounts, enable storage, or publish a public meme gallery, you may incur small monthly fees from backends like Supabase or Xano.
Should I build from scratch or use a no-code app builder for my meme app?
It depends on your goals and technical background.
If your main objective is to learn how to code, then building from scratch is the right path. You’ll get hands-on experience with HTML, CSS, JavaScript, and image-editing libraries. But if your goal is to bring an idea to life quickly or learn the fundamentals of app building, then you should leverage no-code builders.
Today, no-code app builders like WeWeb, Softr, and Bubble integrate AI-assisted development, so you can describe your app idea and let AI generate the app structure, much like AI coding assistants. The key difference is that, in a no-code environment, you don’t have to read, debug, or refactor code yourself. You can simply edit properties, tweak layouts, and iterate visually.